After experiencing going down a steep grade on US 276 from the Blue Ridge Parkway to Waynesville NC with the trailer, I decided I needed an exhaust brake. After researching the available options I went with the PacBrake 44030 kit.
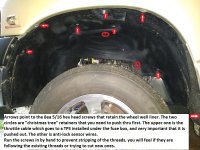
First task was jacking the front end up and pulling the wheels (2WD) and the wheel well liners. This makes easy work of the installation. I got old jeans and tee shirts out of the rag box and covered the front hubs and calipers to help me stay clean.'
First off was installing the brake itself. It seems the clamp joining the elbow to the turbo is always installed with the thread/nut facing the block, but it came loose easily, though I had difficulty breaking the clamp loose. The v-band clamp on the down pipe also was stuck but came loose easier. New one in and clamps snugged and I kept wiggling the brake looking for the sweet spot where it would seat perfectly on the turbo and the down pipe.
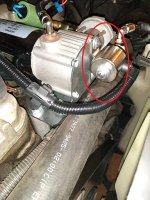
Done with that I moved to the compressor install. I found the wiring harness that runs forward and across the front of the engine had to be removed from the clamp so I stopped and made a extension bracket from a 1 inch strip of 1/8 flat steel to move the clamp out about an inch.
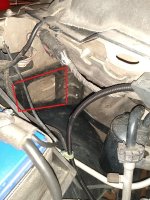
Next was mounting the relays and PB says to put it between the fuse box and the windshield washer bottle on the side, and they show a pic of this, but the '03 is lacking room for it, so I ended up installing it just OB of the brake master cylinder. I used some aluminum angle to make a bracket to attach it to the cowl where there is a large flat protrusion with a hole in it. I included a toggle switch on the bracket with the relays to interrupt the pressure switch circuit to enable/disable the compressor.
Mounting the air tank was rather straight forward, behind the bumper on the LH side. I was going to install it on the transmission crossmember until I realized I had no way to drain it back there. I did add doubler plates to the bracket it is mounted on to stiffen it up some.
Finally I spent a lot of time under the dash running wire. I installed the toggle switch in the lower junk pocket in the middle of the dash on a homemade angle bracket, and took the wire over the steering column and out the grommet with the hood release cable, as it went thru rather easily.
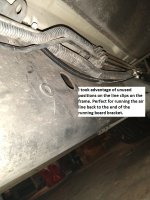
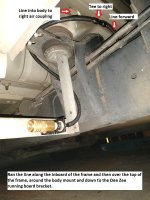
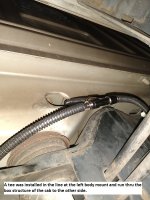
I went to NAPA and bought 50 ft of 1/4 split wire loom material and virtually every bit of air tubing and wiring is encased in it, including the tubing running down the frame to the air coupling I mounted on the rear end of the running board bracket. The tube in the sleeving clipped neatly into unused positions in the fuel line clips on the frame. I also bought a Tee fitting and have run line from the left side thru a body channel to the right side for a second air coupling on the RH running board.
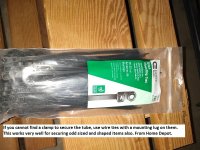
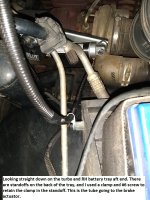
The 1/4 tubing that came with the kit was braided into a bundle, making it useless as there was no way to get the kinks out of it. Also it was not marked as SAE J844 tubing, so that went in the trash and I used some I already had. The instructions call for running the tubing from the compressor to the exhaust brake around the front of the engine, which I was not keen to do, so I shoved it thru the plastic firewall wire harness conduit and sleeved and clamped the exposed portions.
I forgot to add, I don't like tapping into wires so to get ignition power to operate the relays, I did what BD Diesel does with the Howler kit, and use male and female Delphi/APTIV Metra Pac 280 sealed connectors inserted between the wire harness connector and the fuel heater, with a tap to supply the 12v ignition power for the relays (probably less than an amp total draw)
One last comment, for those worried about the compressor being shaken to death on the engine, install a Fluidampr in the place of the original crank damper, the engine does run smoother and quieter with it and no worries about it failing like the original.
I've said too much already, so I'll let the pics tell the story.
Charles
Last edited:

 Attention: TDR Forum Junkies